Case 9030B Excavator Workshop Repair & Service Manual
Catalog:
Model:
Complete digital official shop manual contains service, maintenance, and troubleshooting information for the Case 9030B Excavator. Diagnostic and repair procedures are covered in great detail to repair, maintain, rebuild, refurbish or restore your Case 9030B Excavator like a professional mechanic in local service/repair workshop. This cost-effective quality manual is 100% complete and intact as should be without any missing pages. It is the same factory shop manual used by dealers that guaranteed to be fully functional to save your precious time.
This manual for Case 9030B Excavator is divided into different sections. Each section covers a specific component or system and, in addition to the standard service procedures, includes disassembling, inspecting, and assembling instructions. A table of contents is placed at the beginning of each section. Pages are easily found by category, and each page is expandable for great detail. It is in the cross-platform PDF document format so that it works like a charm on all kinds of devices. You do not need to be skilled with a computer to use the manual.
Factory Manuals For Case 9030B Excavators. Troubleshooting, remove and install, disassembly, installation, repair procedures as well as machine specifications, tightening references, maintenance, inspection. Detailed step by step illustrations, instructions, diagrams.
1,092 pages, bookmarked, Searchable, Printable, high quality PDF
7-62192 - Case 9030B Excavator Service Manual.pdf
PDF Manual:
Instant download – You will receive the link for download on your email immediately after payment.
Lifetime PDF and access to download (by request)
Compatible with Windows, Mac, IOS, Android and other systems
Searchable Text and Built-in index for instant information search
Bookmarks
Printable – pages or entire manual
Zoomable – detailed exploded diagrams, picture
Models
Case 9030B
Contents
Operators Manual
To the Owner of a Case Machine
Identification Numbers / Machine Components
Safety / Decals / Hand Signals
Instruments and Controls
Operating Instructions
Tracks
Lubrication / Maintenance Charts
Lubrication / Filters / Fluids
Maintenance and Adjustments
Electrical System
Machine Storage
Specifications
After Delivery Check
Alphabetical Index
Repair Manual
General
Engines
Fuel System
Electrical System
Tracks
Power Train
Hydraulics System
Mounted Equipment
Hydraulics and Electrical Schematic
EXCERPT:
Installation
STEP 1
Install lifting eyes in the two threaded holes in the top of the valve.
STEP 2
Connect suitable lifting equipment to the lifting eyes on the valve.
STEP 3
Move the valve into position and carefully lower and guide the valve into place on the frame. Use care to clear all hoses and tubes.
STEP 4
Install four cap screws and flat washers to secure the valve to the frame.
STEP 5
Disconnect the lifting equipment and remove the lifting eyes from the valve.
NOTE: When connecting hoses, fittings, and electrical connectors to the valve, pay careful attention to the tags installed during removal to ensure that all connections are correct and not inadvertently switched. After all connections are made, recheck tags and ensure that connections are correct. If the hydraulic hoses are incorrectly connected during installation, the machine will not operate properly and equipment damage may result.
NOTE: Remove and discard identification tags from all hoses, fittings, flanges, adapters and tubes after installation and connections have been checked.
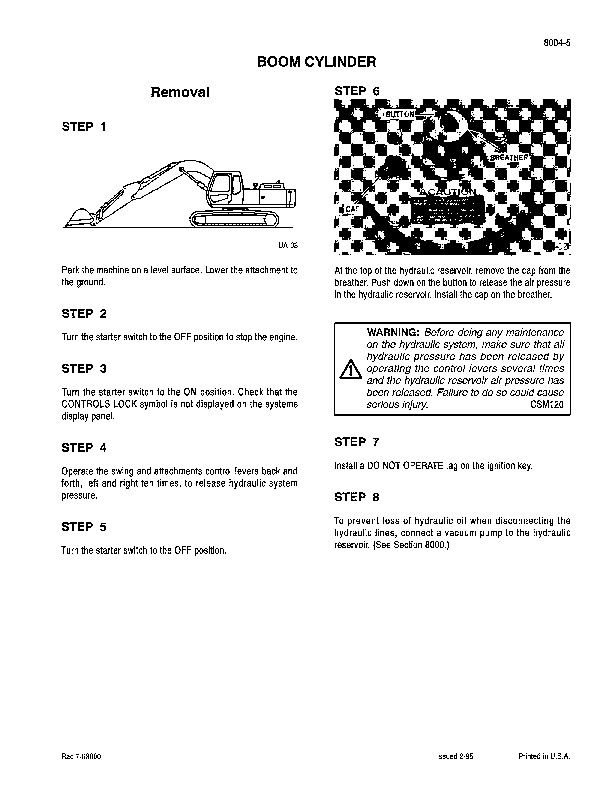
STEP 6
Remove the caps and plugs, install new 0-rings and connect the hoses to the front and side of the valve.
STEP 7
Remove the caps and plugs, install new 0-rings and connect four hoses to the left side of the valve. Install the flanges and the cap screws.
STEP 8
Remove the caps or plugs, install new 0-rings and, using two wrenches, connect the large tube connector to the left side of the top of the valve. Connect the other end of the tube to the hose and tighten the clamp.
STEP 9
Remove the caps and plugs, install new 0-rings and connect the hoses and the pipes to the side of the valve. Install the flanges and the socket head cap screws.
STEP 10
Remove the cap and plug, install a new 0-ring and connect the tee and elbow to the top of the valve. Install the four socket head cap screws.
STEP 11
Remove the caps and plugs and connect the hoses to the fittings on the rear of the valve.
STEP 12
Install and tighten the clamp at the top of the connector.
STEP 13
Connect the two electrical connectors to the valve.
STEP 14
Remove the cap and plug and connect the swing line to the right side of the tee at the top of the valve.
STEP 15
Check all hose and wire connections then remove the identification tags from the hydraulic hoses and electrical wires.
STEP 16
Make sure the drain valve is closed in the bottom of the hydraulic oil reservoir. Remove the cover with breather from the top and fill the reservoir until the oil level is between the high and low marks on the gauge. Reservoir capacity is 32.7 gallons (120 liters) of CASE MS-121 0 TCH hydraulic oil.
Install the cover with the breather cap and secure it with four cap screws and flat washers.
STEP 17
Connect the battery ground (-) cable.
...
Case 9030B Excavator Workshop Repair & Service Manual


