Honda Stream 2001-2004 Factory Service & Shop Manual
Catalog:
Model:

Complete workshop & service manual with electrical wiring diagrams for Honda Stream 2001-2004. It's the same service manual used by dealers that guaranteed to be fully functional and intact without any missing page.
This Honda Stream 2001-2004 service & repair manual (including maintenance, overhaul, disassembling & assembling, adjustment, tune-up, operation, inspecting, diagnostic & troubleshooting…) is divided into different sections. Each section covers a specific component or system with detailed illustrations. A table of contents is placed at the beginning of each section. Pages are easily found by category, and each page is expandable for great detail.
MAKE: Honda
MODEL: Stream
YEAR: 2001 2002 2003 2004
LANGUAGE: English/ French/ German/ Italian/ Dutch/ Spanish/ Portuguese
FORMAT: ISO disk image (750 MB, Windows)
Shop Manual & Body Repair Manual
EXCERPT:
A/T Removal (4AT)
A/T Installation (4AT)
End Cover, 1st Gears, and 1st Clutch Removal (4AT)
End Cover, 1st Gears, and 1st Clutch Installation (4AT)
Park Lever Stop Inspection and Adjustment (4AT)
A/T Housing and Shaft Assemblies Removal (4AT)
A/T Shaft Assemblies and Housing Installation (4AT)
A/T Removal (5AT)
A/T Installation (5AT)
End Cover Removal (5AT)
End Cover Installation (5AT)
Idler Gear Shaft Removal and Installation (5AT)
A/T Idler Gear Shaft Bearing Replacement (5AT)
Park Lever Stop Inspection and Adjustment (5AT)
A/T Housing and Shaft Assemblies Removal (5AT)
A/T Shaft Assemblies and Housing Installation (5AT)
…
A/T Installation
1. Install the air cleaner housing mounting bracket.
2. Install the front mount.
3. Install the rear mount/bracket.
4. Install the torque converter assembly (A) on the mainshaft (B) with the new O-ring (C).
5. Install the 14 x 20 mm dowel pins (D) in the torque converter housing.
6. Place the transmission on a jack, and raise the transmission to the engine level.
7. Attach the transmission to the engine, then install the transmission housing mounting bolts.
8. Install the transmission housing mounting bolts.
9. Install the transmission housing mounting bolts.
10. Install the transmission mount bracket (A). Tighten the mount bolt (B) loosely, and tighten the transmission mount bracket bolt and nuts to the specified torque, then tighten the mount bolt to the specified torque.
11. Install the new set ring (A) on the intermediate shaft (B).
12. Clean the areas where the intermediate shaft contacts the transmission (differential) with solvent or carburetor cleaner, and dry with compressed air. Then install the intermediate shaft in the differential. While installing the intermediate shaft, be sure not to allow dust or other foreign particles to enter the transmission.
13. Install the new set ring (A) on the left driveshaft (B).
14. Install the right and left driveshaft (see page 16-0). While installing the left driveshaft in the differential, be sure not to allow dust or other foreign particles to enter the transmission.
NOTE: Clean the areas where the left driveshaft contacts the transmission (differential) with solvent or carburetor cleaner, and dry with compressed air.
Turn the right and left steering knuckle fully outward, and slide the left driveshaft into the differential until you feel its set ring engages the side gear. Slide the right driveshaft over the intermediate shaft splines until you feel the driveshaft engages the intermediate shaft set ring.
15. Support the sub-frame (A) with a 4 x 4 x 40 in. piece of wood (B), and lift it up to body.
16. Loosely install the four sub-frame mounting bolts.
17. Align the reference marks (A) with the center of the sub-frame mounting bolt heads (B), then tighten the bolts to the specified torque.
18. Install the rear mount bracket bolt.
19. Install the front mount bolt (A) and nut (B), connect the ATF cooler hose (C) to the ATF cooler or ATF filter (D) whichever removed.
20. Remove the jack from the transmission.
21. Attach the shift cable end (A) to the control lever (B), then insert the control pin (C) into the control lever hole through the shift cable end, and secure the control pin with the spring clip (D). Do not bend the shift cable excessively.
22. Install the shift cable cover (E), then secure the shift cable holder (F) to the shift cable cover with the bolts.
NOTE: To prevent damage to the shift cable end at the control lever joint, be sure to secure the shift cable holder to the shift cable cover after installing the shift cable cover to the torque converter housing.
23. Attach the torque converter to the drive plate with eight bolt (A). Rotate the crankshaft pulley as necessary to tighten the bolts to 1/2 of the specified torque, then to the final torque, in a crisscross pattern. After tightening the last bolt, check that the crankshaft rotates freely.
24. Install the torque converter cover (B).
25. Install the exhaust pipe A with the new gaskets.
26. Connect the primary HO2S connector (A) and secondary HO2S connector (B), and clamp the harnesses.
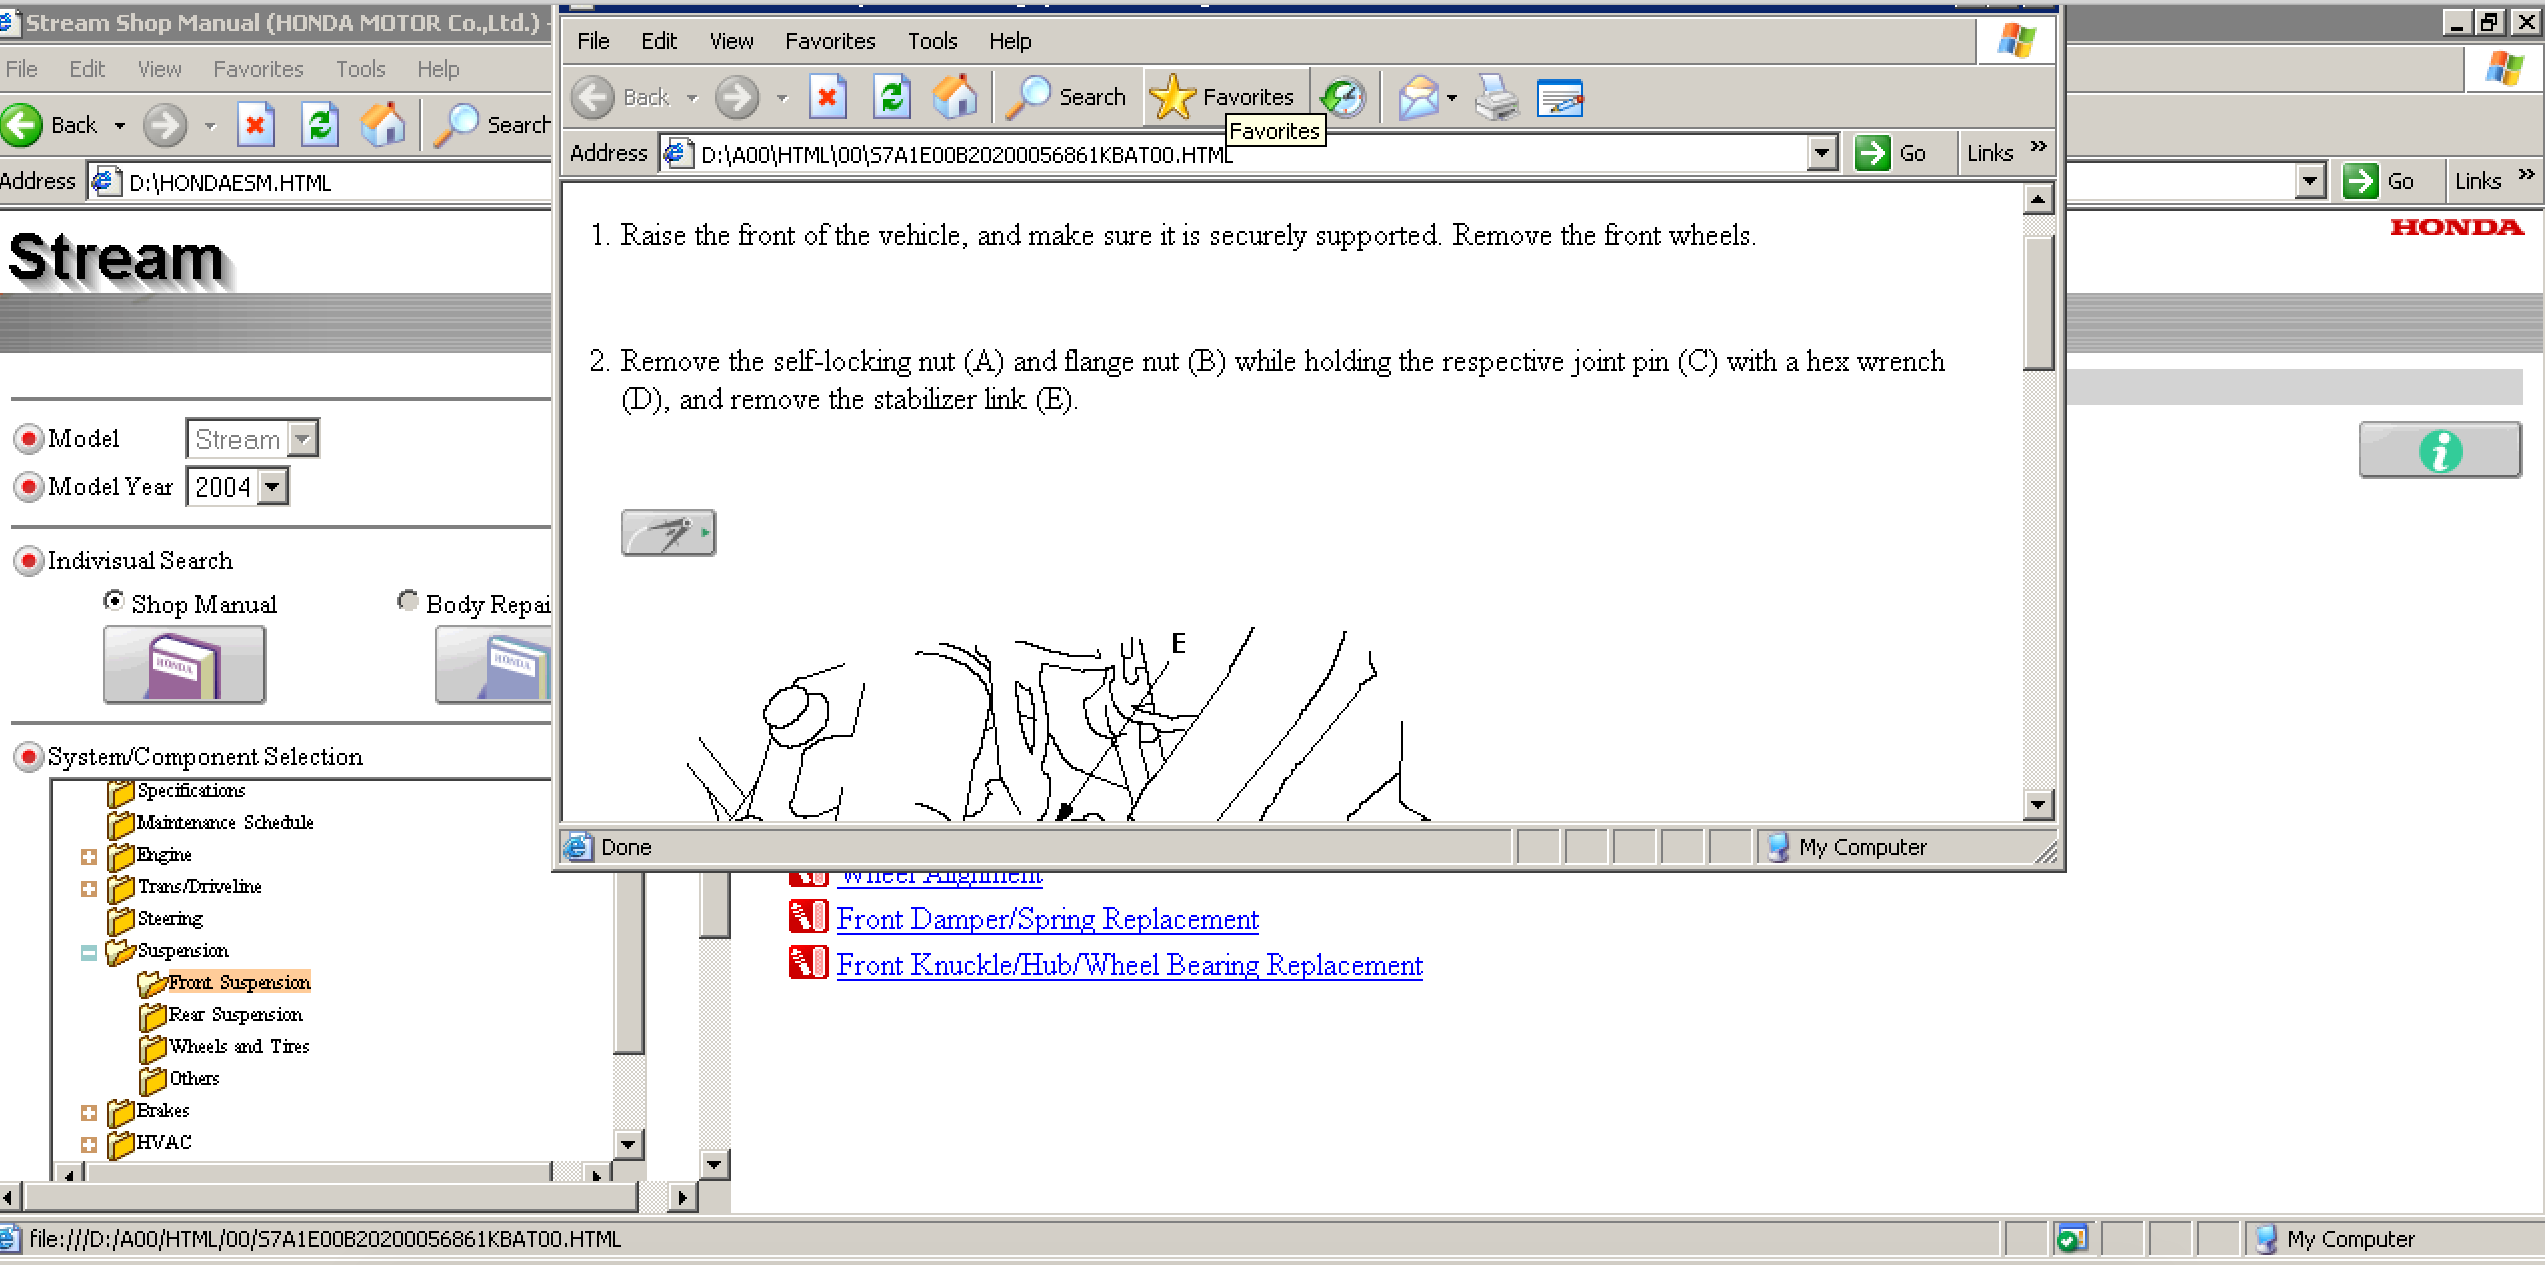
27. Connect the ball joints (A) to the lower arms (B), and install the castle nuts (C) and spring clips (D). Insert the spring clips from inside of the vehicle, and facing its hook side to front (E) of the vehicle in the range of the insertion direction shown.
28. Connect the ball joint pins (F) to the lower arms, and install the nuts (G). Insert a 5 mm Allen wrench (H) in the top of the ball joint pins, and tighten the nuts.
29. Install the splash shield.
30. Remove the hoist from the hoisting bracket, and remove the hoisting bracket from the engine.
31. Connect the ATF cooler hoses (A) to the ATF cooler lines (B).
32. Connect the shift solenoid harness connector (A), A/T clutch pressure control solenoid valve B connector, and solenoid valve C connector. Install the harness clamps (D) on the clamp brackets. (E).
33. Connect the transmission range switch connector (A), and install it on its bracket (B).
34. Connect the connectors to the mainshaft speed sensor (C) and countershaft speed sensor (D).
35. Connect the A/T clutch pressure control solenoid valve A connector and 2nd clutch pressure switch connector (B), and install the harness clamps (C) on the clamp brackets (D).
36. Install the transmission ground terminal (E).
37. Connect the 3rd clutch pressure switch connector.
38. Install the battery base, then install the harness clamp on the clamp bracket on the base.
39. Refill the transmission with ATF.
40. Install the intake air duct and air cleaner housing.
41. Install the battery tray and battery, then secure the battery with its hold-down bracket.
42. Connect the battery positive terminal, then connect the negative terminal.
43. Set the parking brake. Start the engine, and shift the transmission through all gears three times.
44. Check the shift lever operation, A/T gear position indicator operation, and shift cable adjustment.
45. Check and adjust the front wheel alignment (see page 18-0).
46. Start the engine and let it idle reach normal operating temperature (the radiator fan comes on) with the transmission in [P] or [N] position, then turn it off and check the ATF level (see page 14-336).
47. Perform the road test.
48. Enter the radio station presets, and set the clock.


