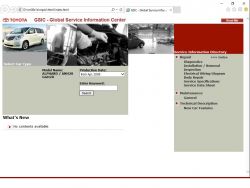
Toyota Alphard 2008-2015 Workshop Repair & Service Manual
Catalog:
Model:
Complete official workshop manual with Electrical Wiring Diagrams contains service, maintenance, and troubleshooting information for the Toyota Alphard 2008-2015. Diagnostic and repair procedures are covered in great detail to repair, maintain, rebuild, refurbish or restore your Alphard like a professional mechanic in local service/repair workshop. This cost-effective quality manual is 100% complete and intact as should be without any missing pages. It is the same factory shop manual used by dealers that guaranteed to be fully functional to save your precious time.
This manual for Toyota Alphard 2008-2015 is divided into different sections. Each section covers a specific component or system and, in addition to the standard service procedures, includes disassembling, inspecting, and assembling instructions. A table of contents is placed at the beginning of each section. Pages are easily found by category, and each page is expandable for great detail.
MAKE: Toyota
MODEL: Alphard (ANH20 / GGH20) (a.k.a. Vellfire)
YEAR: 2008 2009 2010 2011 2012 2013 2014 2015
FORMAT: CD ISO/PDF
LANGUAGE: English
PAGES / SIZE: 279 MB
EXCERPT:
FIT STANDARD / ADJUSTMENT METHOD / TORQUE
SPECIFICATION
1. HOOD
HINT:
Centering bolts are used to mount the hood hinge and hood lock. The hood and hood lock cannot be adjusted with the centering bolts installed. Substitute the centering bolts with standard bolts (with washers) when making adjustments.
(a) Horizontally and vertically adjust the hood.
(1) Loosen the 4 hinge bolts of the hood.
(2) Adjust the clearance between the hood and front fender by moving the hood.
(3) Tighten the 4 hinge bolts after the adjustment.
Torque:
12 N.m (122 kgf.cm, 9 ft..lbf)
(b) Adjust the height of the front end of the hood using the cushion rubbers.
HINT: Raise or lower the front end of the hood by turning the cushion rubbers.
(c) Adjust the hood lock.
(1) Loosen the 3 bolts.
(2) Tighten the bolts after the adjustment.
Torque:
7.5 N.m (77 kgf.cm, 66 in..lbf)
(3) Check that the striker can engage with the hood lock smoothly.
2. FRONT DOOR
NOTICE:
Before adjusting the door positions of vehicles equipped with side airbags and curtain shield airbags, be sure to disconnect the cable from the negative (–) battery terminal. After
adjustment, inspect the SRS warning light, the side airbag system, and the curtain shield airbag system for normal operation. Then initialize both airbag systems.
HINT:
• Use the same procedure for the RH side and LH side.
• The procedures listed below are for the LH side.
• Centering bolts are used to mount the door hinge to the vehicle body and door. The door cannot be adjusted with the centering bolts installed on it. Substitute the centering bolts with standard bolts (with washers) when making adjustments.
(a) Using SST, loosen the hinge bolts on the vehicle body and adjust the door position.
SST 09812–00010
(b) Tighten the hinge bolts on the vehicle body after the adjustment.
Torque:
26 N.m (265 kgf.cm, 19 ft..lbf)
(c) Loosen the hinge bolts on the door and adjust the door position.
(d) Tighten the hinge bolts on the door after the adjustment.
Torque: 12 N.m (122 kgf.cm, 9 ft..lbf)
(e) Adjust the striker position by slightly
loosening the striker mounting screws with
a “TORX” socket wrench T40 and hitting the striker with a plastic hammer.
(f) Using a “TORX” socket wrench T40, tighten the striker mounting screws after the adjustment.
Torque: 23 N.m (235 kgf.cm, 17 ft..lbf)
...


